


Archive for the ‘Uncategorized’ Category:
Spooky Cat Door Prize Card # 4
Hello,
Card No, 4 from the Spooky Cat tutorial I bought from Chet at www.memystampsandi.com. These cards were made using the Spooky Cat Stamp set and Cat punch.
Have a super Duper DAy.
Pam

 Subscribe to the comments for this post
Spooky Cat Door Prize Card # 3
Hello,
Card No, 3 from the Spooky Cat tutorial I bought from Chet at www.memystampsandi.com. These cards were made using the Spooky Cat Stamp set and Cat punch.


Enjoy.
Pam
Halloween treats Made for my Great Nieces and Nephew
Hi Girls,
Today I will show you the cute Halloween Treats I made to send to my great Nieces and Nephew. My Great Nephew James is 8 and my two great nieces Gracie and Rory are 3. I love making Halloween treats for them and with all the ideas out there, just had to make them and plus the fun candy I found.
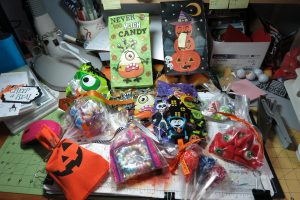
This is the picture of the treats packaged and made for each of them. You know me I never do small I go big, big, big.
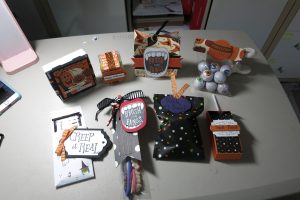
This is the picture of the treats I actually made for them. It only took me a whole Sunday afternoon to make 3 sets of these and packages the rest of the goodies.
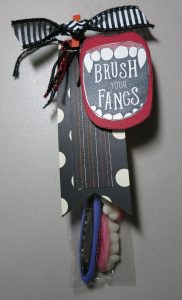
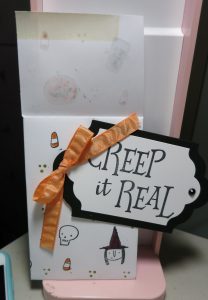
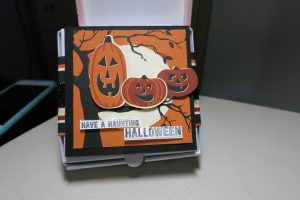
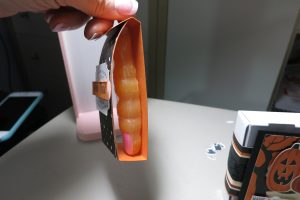
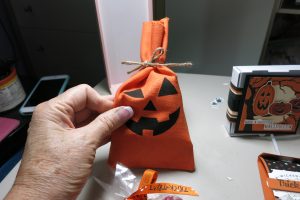
Is this not the cutest… I got this idea from Eric Cerwin and it was so cute I had to make it. Its made with the great Creep it Real stamp set and using the great Black ribbon from the Holiday catalog.
A better close up of the treat but what you can’t see if the teeth are sparkled with a glitter pen.

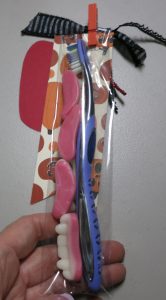
Did you notice the cute teeth candy I put into the treat bag. I found these teeth gummies at Target and knew they would be perfect for this treat. Believe it or not, but the teeth tasted pretty good too, as of course I had to try it.
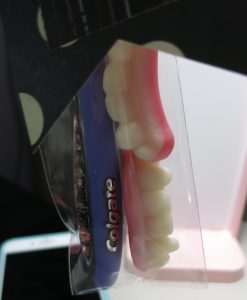
Close up of the teeth, They look so real right.
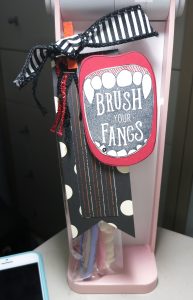
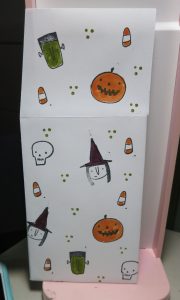
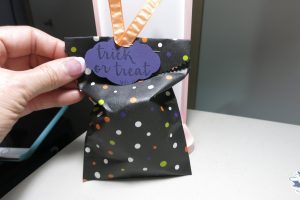
Since I could only put so many teeth in the treat bag I made this treat holder out of our Halloween DSP to hold the rest of the teeth that were put in baggies and into the treat bag. Again the teeth were sparkly as I used the glitter pen on them.
Found this cute from a youtube video by stampinwithjill.com, This treat holder was made using a standard white envelope. Stamp it first then fold in half.
When you fold the envelope in half you cute a pouch for a Hershey bar to be put in
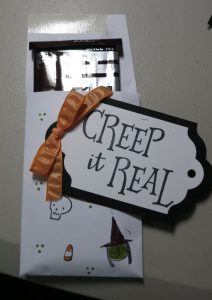
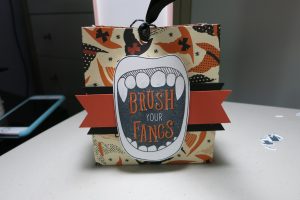
Here is the finished treat with the ribbon and tag. So cute and so easy to make using the Creep it real Stamp set.
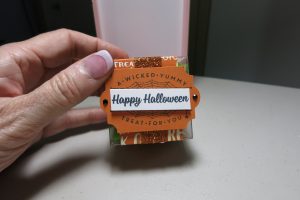
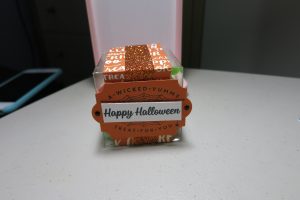
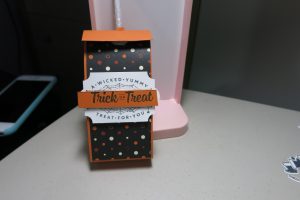
This treat was made using the plastic boxes SU sells in the catalog. I wish I took a picture of the candy as I found finger chewy candy to put in them. This treat was so easy to make with the Halloween DSP and tag punch, etc. I don’t have what all these items are called sorry but they are in the Holiday or main catalog
Of course I had to decorate the Mini White boxes that are in the Holiday Mini catalog and put a thing of pulled gum the kids like (can’t remember what they are called) but a perfect size for this treat.
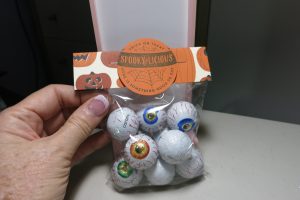
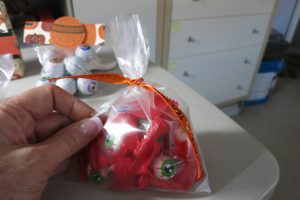
I found these chocolate Eye ball candy and put them in a 6 x 4 SU bag and then made a bag topper for it. Super easy.
Found this cute treat pouch at Micheals (as its paper) and put a teeth ring in it for the kids.
I bought these cute Finger suckers at Michaels and wanted to make a sucker box and found one Youtube created by becreativestamping. My suckers were too big for her sucker holder so I had to remeasure for mine. They are cute and make a cute treat holder
Side view of the finger suck inside.
Eyeball gum I packaged up in our bags and added some Halloween Ribbon I found at Michaels.
More bag packaging.

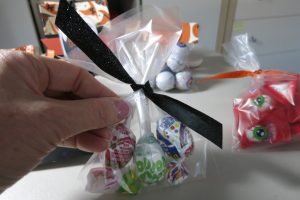
Found these cute braclet, rings and file hard candy for my nieces.
Found these disney suckers for the girls. Put them in a bag and added the spooky hat to the bag to dress it up.
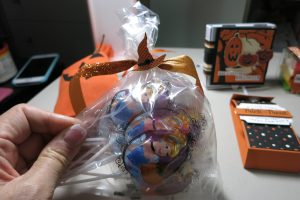
Found this cute bag at the dollar store and put more candy in it for the kids.
So as you can tell, I had fun making them all and hope the kids like them as I have to ship a box to Chicago and one to Middleburg Fl. As of today both boxes arrived safely.
Have a great weekend my friends. I am so excited as of tomorrow we leave for our trip to Disneyworld to spend time with my sister and her family. Its my brother-in-law Tim’s 60th birthday on Tuesday so we are all going to celebrate his birthday week at Disney. Can’t wait as I also get to spend time with my two nieces to and their families… and I get to send quality time with Rory… can’t wait.
Pam
Spooky Cat Door Prize Card # 2
Hello,
Card No, 2 from the Spooky Cat tutorial I bought from Chet at www.memystampsandi.com. These cards were made using the Spooky Cat Stamp set and Cat punch.
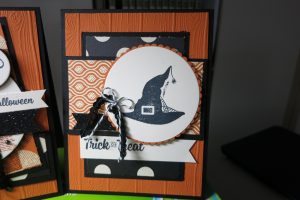
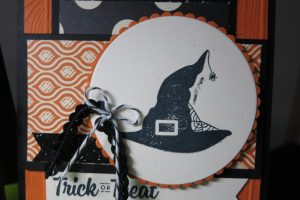
Such a cute card. Love it.
Have a wonderful day.
Pam
Spooky Cat Door Prize Card # 1
Hi there and welcome back,
As you know my stampers that come to my SAS always go home with a door prize which consists a pack of 4 cards. Usually the same stamp set making 4 different cards with it. My sister Ruth makes all the door prizes for me which is awesome and love her for it. Without her, I would not have any door prizes.
I bought this Spooky Cat Tutorial from Chet at www.memystampsandi.com. She sells a tutorial every month and its a great deal as she does great cards. For the next 4 days, you will view the 4 cards made from this tutorial. Below is the 1st of 4 cards.


Close up of the ribbon and sequin ribbon.
Great card made with the Spooky Cat punch.
Have a great day,
Pam
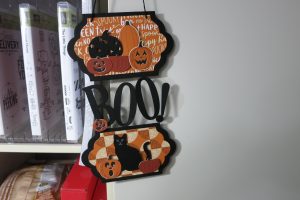
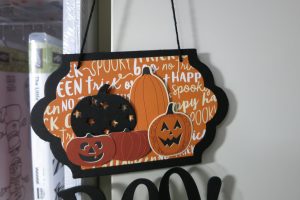
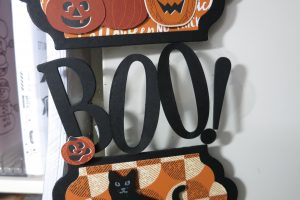
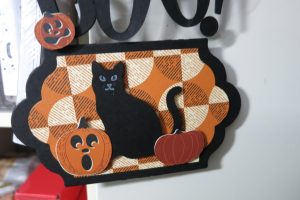
Spooky Cat Boo Halloween Banner
Hi there,
My sister Ruth found this Boo Hanger on Pintrest and made it. She showed me hers and loved it and knew I mad to make it for an extra door prize at my Sept SAS. I cased this idea from Tricia Chuba at www.butterdishdesigns.com.
This was so easy to make as there was no stamping just cutting out the pieces from the Big Shot using the Pick a Pumpkin Thinlet die and SU Letter die. For details on the card, please check out Tricia blog.
Bike Ride #10 card from Sept SAS
Happy Friday my friends. HOpe you have a great weekend.
I have wanted to use this Bike Ride stamp set and die that is in the new catalog. I totally cased this card from another demo and forgot who, so sorry and what a great card it is to give the right person credit. This card is made up of stamping and die cutting out bike, wheels, seat, dog, Basket, handles and bike stand.
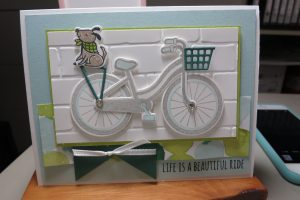
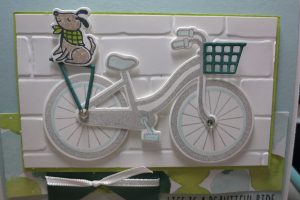
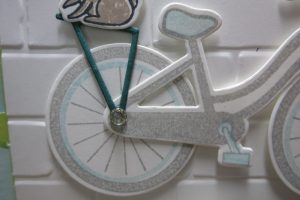
Paper: White, Pool Party, Tanquil Tide, Naturally Electric DSP
Ink: Black, Pool Party, Smoky Slate, Crumb Cake and Lemon Lime Twist
Brickwall embossing folder
Really cute fun card. Enjoy
Pam
colorful Seasons Card – SAS Card # 7
Hello there and welcome back.
Love this Colorful Season’s stamp set. It has fall, spring, winder and summer stamps in it. I wanted to use the beach chair again and create a fun card. So below is what I came up with.
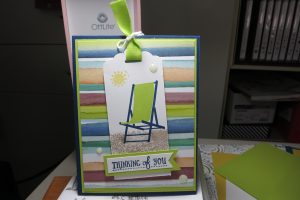
Stamp Set: Colorful Seasons, High Tide,
Paper: Dapper Denim, Lemon Lime Twist, White, Naturally Electric DSP
Ink: Dapper Denium, Lemon Lime Twist, Daffadil Delight, Crumb Cake
Accessories: Scallop Tapper Punch, 1/2 ” Finely Woven Ribbon, White Twine, White Pearl Accents.
Enjoy my friends.
Pam
Grown with Love Card # 9 for Sept SAS
Hello and welcome back.
Love this card and its a total case but forgot who I cased the card from (sorry) but love this card and so easy to make with the Grown with love stamp set and Garden Grown Framelits.
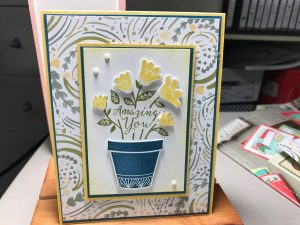
Paper: Daffodil Delight, Denim and white
Ink: Daffodil Delight, Old Olive, Denim
Pearls
Love this card and was fun to make. Enjoy,
Pam
You’ve Got Style Card # 8 for SAS
Hi There and welcome back.
This fun stamp set You’ve got Style is a fun set and wanted to use it for a while for the SAS. I cased this card from Tami White at www.stampwithtami.com. Such a fun card and i just had to make it for this event
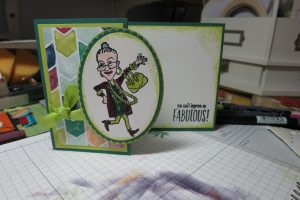
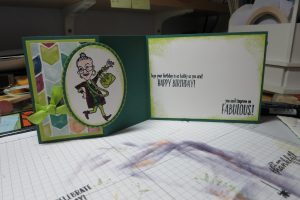
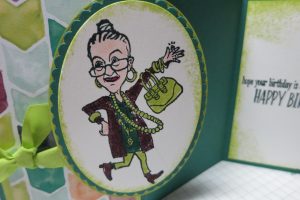
Stamp set: You’ve Got Style
Paper: Tranquil Tide, Lemon Lime Twist, White, Naturally Electric DSP
Ink: Black, Lemon Lime Twist
Markers: Tranquil Tide, Lemon Lime Twist, Blush
Accessories: Layer Oval Framelits, 3/8 Lemon Lime Twist Ribbon