


Archive for the ‘Uncategorized’ Category:
Array of Sunshine
Happy Saturday my friends.
Since the picture on this post did not come through the other day, I thought I would repost it.. so here is my repost with the picture of the Array of Sunshine card.
Today is another case of a blog and I love this Array of Sunshine from by Jen Sannes at http://www.simpleandsincere.com. Didn’t she do a beautiful job on this card. I am going to case this card for my next SAS which will be held Sept 9th and 10th. Love the colors and this hostess set (which anyone can earn now with an order of $150.00 or more…

Stamps: Array of Sunshine, Thank You Kindly
Paper: Pool Party, Calypso Coral, Whisper White
Ink: Pool Party, Calypso Coral, Lucky Limeade, Basic Black
Accessories: Lucky Limeade ruffled ribbon, Designer Printed Brads, Scallop Border punch
Thanks for stopping by and check back tomorrow for more goodies.
Pam

 Subscribe to the comments for this post
Butterfly Easel Card by Debbie
Happy Friday my friends,
Today is another day of Casing or just showing you some casing cards from other stampers blogs. Debbie Henderson is a fabulous stamper and has a lot of great ideas. Her blog is http://debbiesdesignsblog.blogspot.com.
Butterfly Easel Card
Bronwyn Eastly came up with this fabulous easel card idea. As you can tell in the photo below, this tiny little easel card is actually created from the “Beautiful Butterflies Die”. I cut (1) full butterfly:

Embossed it with the “Vintage Wallpaper Textured Impressions Folder and sponged “Whisper White Craft Ink” over the embossing. The cardstock color is Always Artichoke:
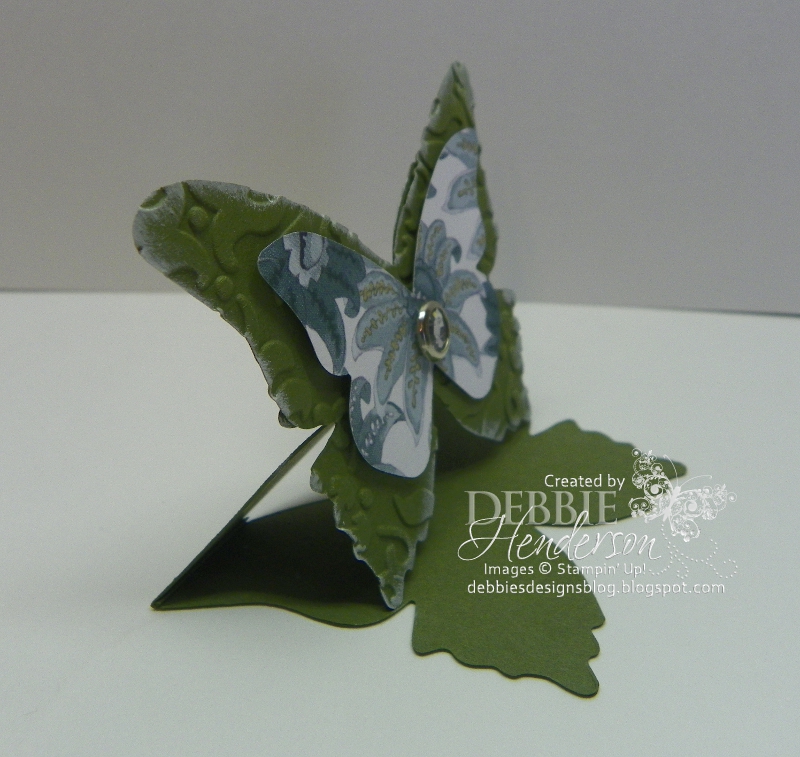
I then added a 2nd smaller butterfly from the “Paisley Petals DSP” and secured it in the center with a “Rhinestone Brad”.
For the easel part of the card, I prepared the 2nd layer by cutting another butterfly with a piece of cardstock that was folded in half (double layer). Omit part of the tips of the butterfly wings so that the fold stays intact. You can complete this by placing the fold inside the butterfly about 1/2″:
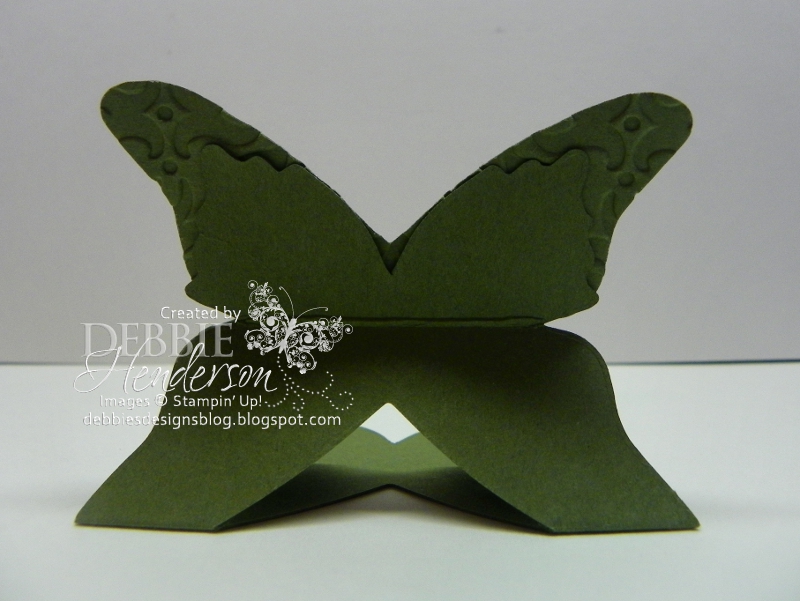
You will notice the fold where part of the wings were omitted. When the easel part is opened, the butterfly actually sits upside-down on the backside. Using one layer of the easel part, create a fold at the half-body of the butterfly and glue your first decorated butterfly to the top portion of the fold. The bottom layer sits flat. You can fold the easel card and mail in an envelope flat. Cute, cute!!
Very cool huh.. no why can’t I come up with these ideas on my own.
Sorry for all the casing this week but it did give me a break. Over the next several weeks, I will be showing you the 10 cards made at my July SAS held today and tomorrow. Then I will show case the door prizes I made and then of course pictures of the gals and their winning door prizes.. so stay tuned for original work coming up. Thanks for understanding and letting me veg this week.
Pam
Fabulous Florests
Hello again,
Today’s post is from InkBig – A Stampin’ Up! oasis where you can scrap, stamp, share and shop! by InkBig where she used the Fabulous Florest set using some of the new in-colors from the new SU catty.
Stamp Set: Fabulous Florets
Ink & Paper: Calypso Coral, Lucky Limeade and Wisteria Wonder.
Cool Technique: She used Ink: Lucky Limeade inkpad to custom dye some white taffeta ribbon to tie this card together.
Love this and may be another case for another SAS… so many great ideas.
Have a great day my friends.
Pam
Pretty Petals Note Pad by Chet
Hello my friends and happy Tuesday to you.
I don’t have anything new to show you that I made, but thought I would spend this week to show off other blogs and their creations. My first was Jill Hillards blog yesterday and the nice tutorial she provided. I am getting ready this week for my July SAS held this weekend so no time to prepare projects f0r my blog, so time to case others blogs.
This pretty petals note pad is made from one of my favorite stampers (and blog that I visit every day) as Chet is so talented. Me,My Stamps and I
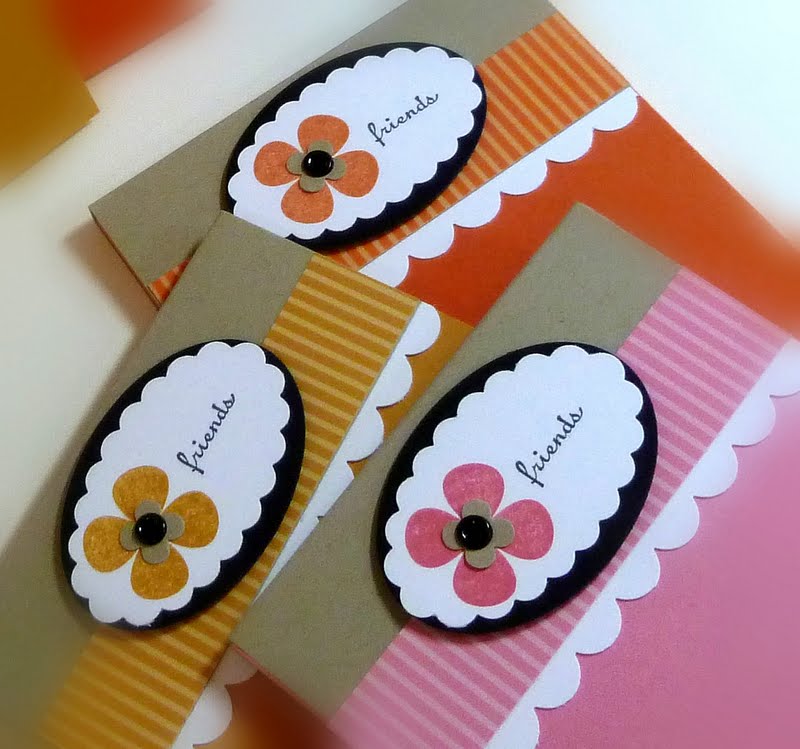
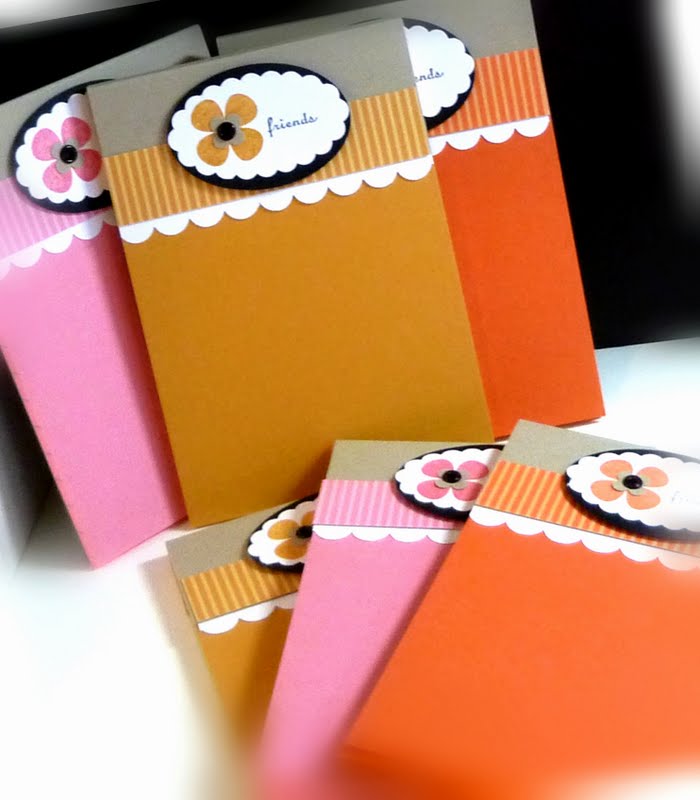
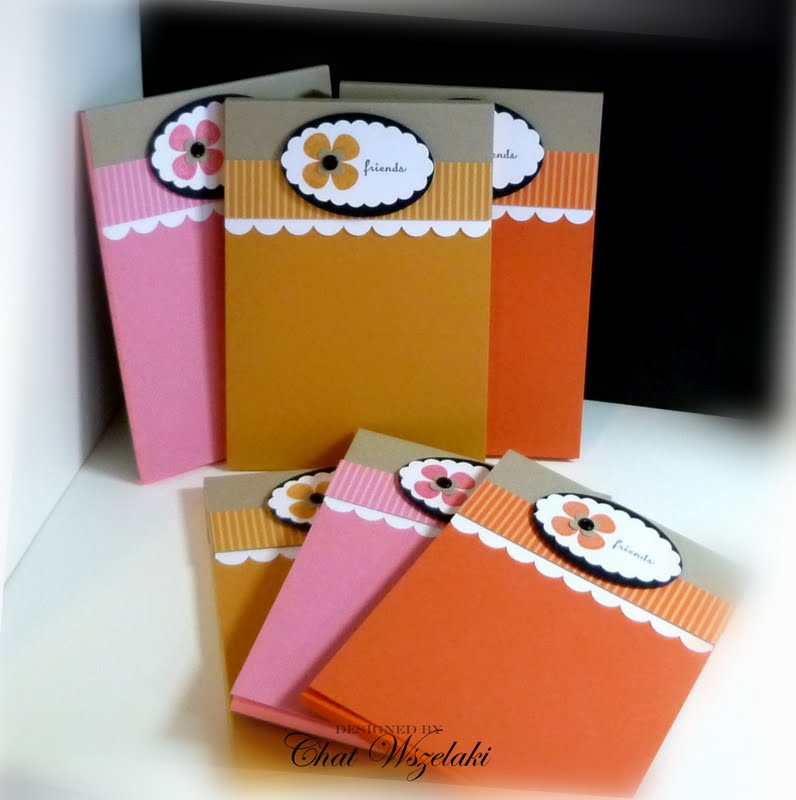
RECIPE:
Stamps: Pretty Petals, Tiny Tags
Paper: More Mustard, Regal Rose, Tangerine Tango, Whisper White, Crumb Cake, DSP
Ink: Basic Black, More Mustard, Regal Rose, Tangerine Tango
Accesories: eyelets
Tools: scallop edge punch, oval and scallop oval punch
Thanks for checking out my blog and come back tomorrow for more great stuff.
Pam
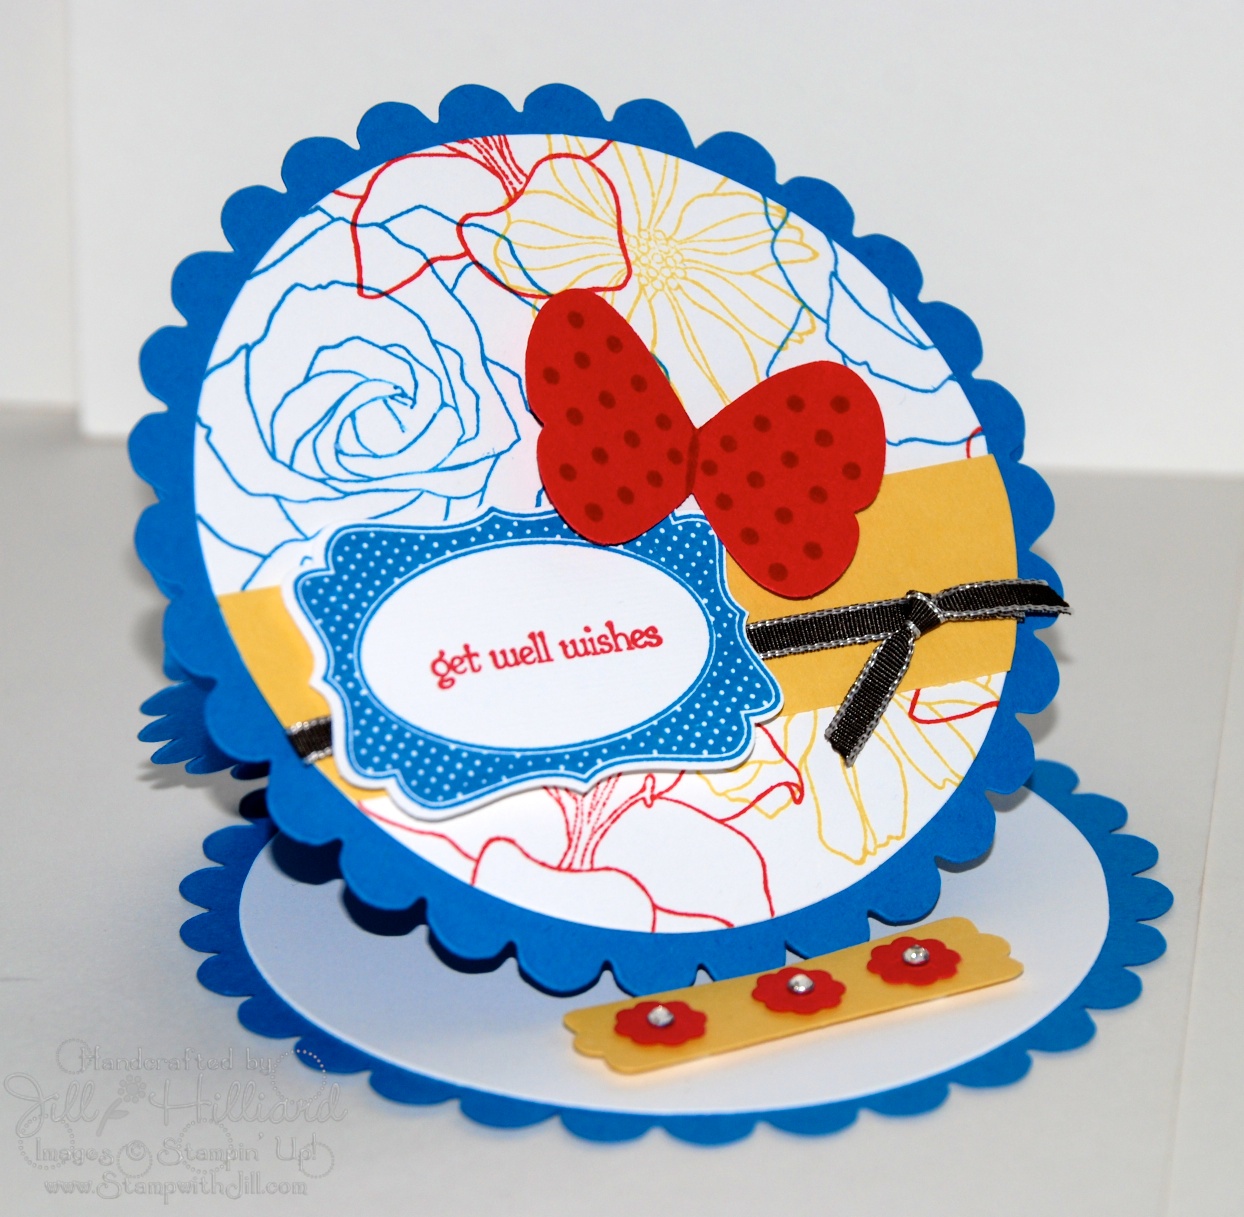
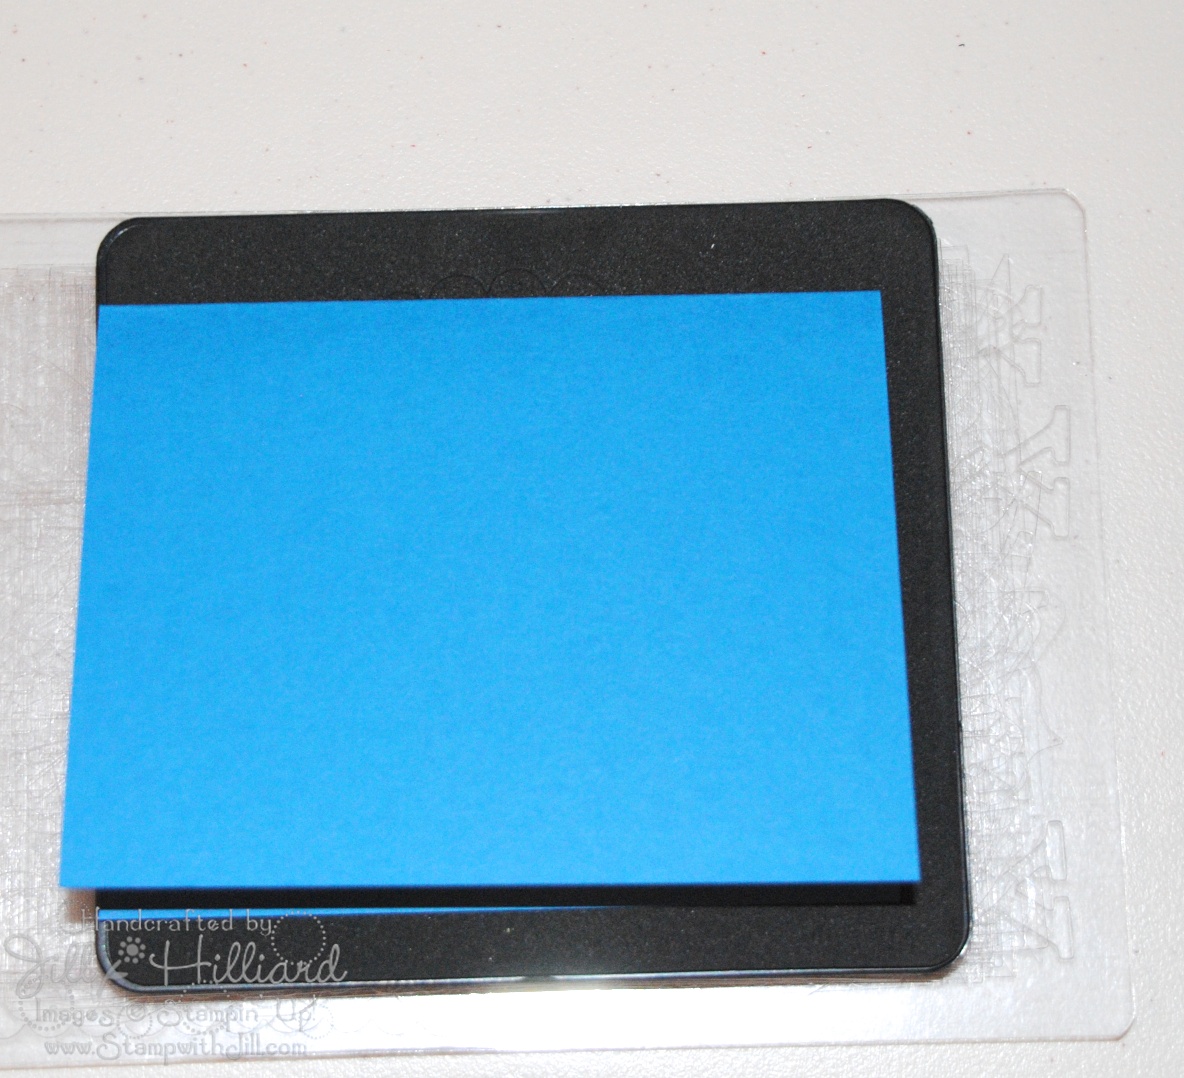
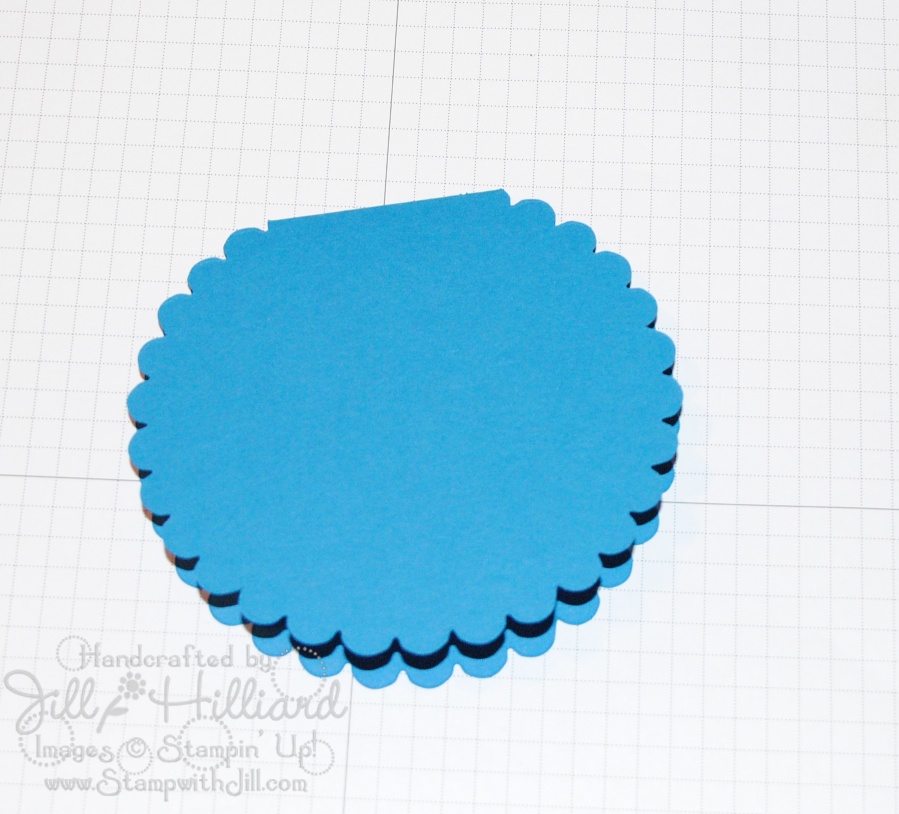
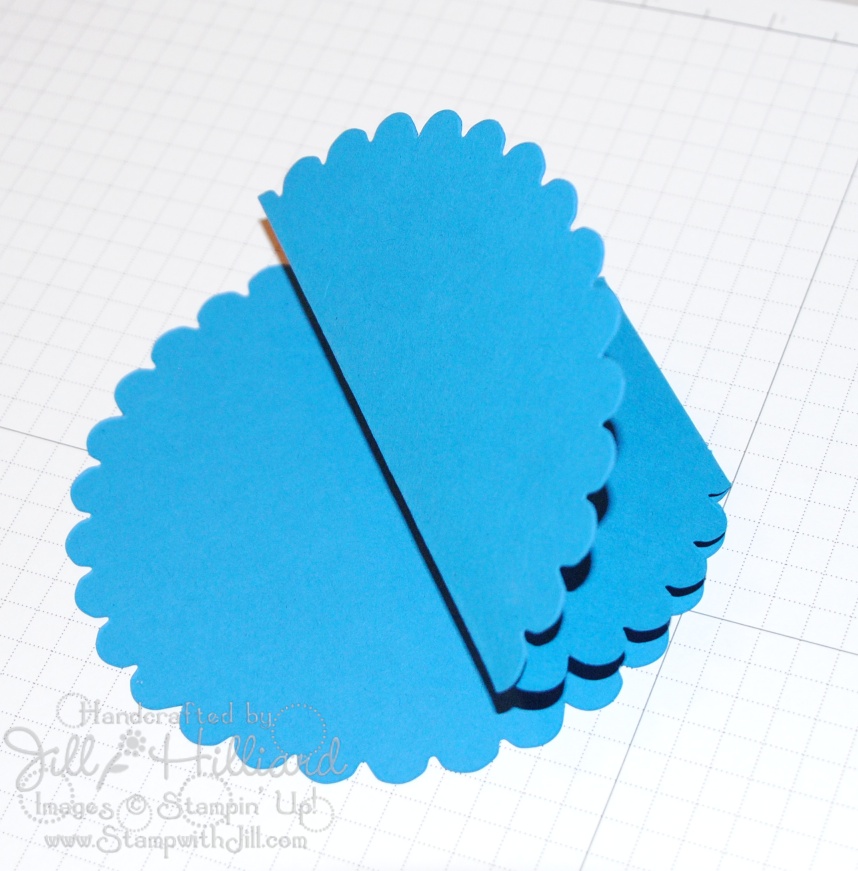
Scallop Easel Quick Turorial Card
Scallop Easel Card-a quick tutorial
I stole this really easy tutorial from Jill Hilliard. What a fun way to do a cool card. I will be doing a version of this card at my September 9th and 10th SAS.
Love & Care # 4
Happy Friday my friends, I hope you all have something fun planned this weekend.
Trying to play with some colors and came up with this card. Actually I got the color idea from the catalog but did not have the Field Flower set that it was made with so I made it using the Love and Care Hostess set. I love the colors (as I love pink) and was going to make this card for my July SAS but found some other great cards to case from the new catalog since my SAS is called “All New Things” held on July 22nd and 23rd. I still have spots open if you want to join us for the fun…

Have an excellent weekend and have fun.
Pam
My Friend
Hello,
Today’s card is made using another new set from the catalog called My Friend. It also uses some new designer paper and another die cut from the Pennant Die set. Too cool.

Have a super duper day.
Pam
Delicate Doiles # 2
Happy Hump Day my friends and welcome back,
Here is another card made with the Delicate Doiles stamp set and the new Fancy Fan Letterpress Plate (on the cool Party paper (which is also a new in-color color). Also the die cut on the card is from the new Pennant Die cut (really cool huh). Lots of great new stuff in the new catalog. Let me know what your favorite stamp set or accessories is.

Have a happy, happy day.
Pam
Delicate Doilies – Bright Card
Welcome back my friends,
Today’s card is another card I made using the new Delicate Doilies stamp set from the new 2011-2012 SU Catalog. I cased this card from another demo but forgot her name, but what a great bright card. This card also uses new designer paper called Flirtatious Specialty. The other colors are daffodil delight and pumpkin pie. I almost made this card for one of my SAS but decided on another one (not as bright).

Have a good day my friends.
Pam
Love and Care Colorful
Happy Monday my friends.
Sorry I did not post much last week but didn’t have any new cards from supplies from the new catalog.. but this week I do.

This cards is made using the Love & Card hostess set from the summer mini catalog which I love (as you can tell) and the Four Frames Stamp set from the new catalog. I also used some retired supplies to make this card as in sale-a-bration DSP and then used Peach Parfait, Mellow Mambo Pacific Point, made and ink. A bright card but a fun card.
Enjoy my friends.
Pam